Post Author:
Blink Juwele
Categories:
Date Posted:
February 21, 2023
Share This:
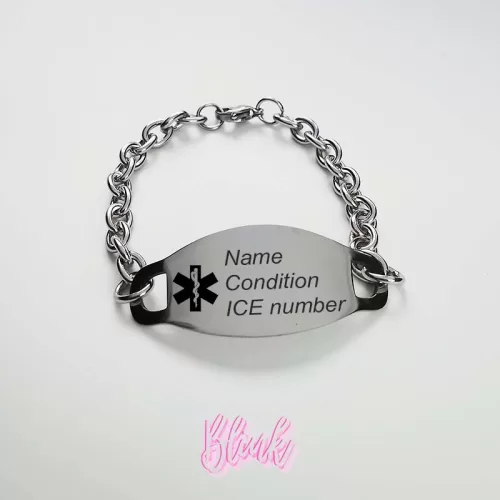
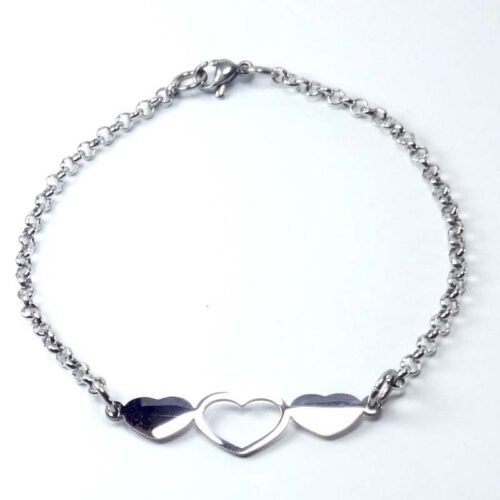
Jewelry photography
Jewelry photography can be a challenging endeavor, but with the right approach and tools, it’s possible to create stunning images that showcase the beauty and unique qualities of each piece. In this blog post, we’ll cover some of the basic principles of jewelry photography to help you get started.
Click on the highlighted text to jump to the specific section
- Lighting: One of the most important aspects of jewelry photography is lighting. Natural light is the best option for jewelry photography as it creates a soft and even illumination that brings out the beauty of the jewelry. You can shoot outdoors or near a large window with diffused light. If you are shooting indoors, you can use a softbox or light tent to diffuse the light and eliminate harsh shadows.
- Background: A simple and clean background is essential for jewelry photography as it puts the focus on the jewelry itself. A plain white or black background is the best option, but you can also use a neutral-colored cloth or a reflective surface to create a beautiful reflection of the jewelry.
- Camera and Lens: A camera with manual controls and the ability to shoot in RAW format is ideal for jewelry photography. A macro lens will allow you to capture the intricate details of the jewelry, and a tripod is essential to keep your camera steady and avoid blurry shots.
- Composition: Jewelry photography is all about capturing the details and uniqueness of each piece. You can experiment with different angles and compositions to create interesting and visually appealing shots. Close-up shots of the jewelry can be particularly effective.
- Post-Processing: Post-processing can help to enhance the final image and make it look more professional. Adjusting the brightness and contrast, removing any blemishes or dust, and cropping the image to the right size can all make a big difference.
- Consistency: Consistency in your photography is essential if you want to build a brand or a business. Using the same background, lighting, and composition for all your shots will create a cohesive and professional look that will help your jewelry stand out.
In conclusion, jewelry photography can be a challenging but rewarding endeavor. By following these basic principles, you can create stunning images that showcase the unique beauty of each piece. Remember, practice makes perfect, so keep experimenting and refining your technique until you get the results you’re after. Good luck!
Welcome to the World of #Blink
Pretoria’s Largest Selection Of Stainless Steel Jewelry And Men’s Jewelry At The Lowest Prices In SA
We design and manufacture unique quality Stainless Steel Jewelry
Collection in Pretoria East or Ship all over South Africa
Hypoallergenic, non fading for all skin types
Subscribe for 15% Discount
What is the best lighting for jewelry photography?
- Use diffused light: Direct sunlight can be too harsh and create unwanted shadows on the jewelry. Use diffused light by shooting near a large window, or outside on a cloudy day. This will create a soft and even illumination that will enhance the beauty of the jewelry.
- Avoid mixed lighting: Avoid mixing natural light with artificial light, as this can create color casts and make it difficult to achieve accurate colors in your photos.
- Use a reflector: A reflector is a flat surface that reflects light back onto the jewelry, creating a beautiful reflection that enhances the overall image. Use a white or silver reflector to create a natural-looking reflection.
- Consider the time of day: The best time of day for natural light photography is usually in the morning or late afternoon, when the sun is not directly overhead. This will create a warm and flattering light that will bring out the beauty of the jewelry.
- Use a light tent: A light tent is a box-like structure made of translucent material that diffuses the light and creates a soft, even illumination. This is an excellent way to control the lighting and ensure that the jewelry is evenly lit from all angles.
By using natural light and these techniques, you can create stunning jewelry photography that showcases the beauty and unique qualities of each piece.


What is the best background for jewelry photography?
The best background for jewelry photography is a clean and simple one that doesn’t distract from the jewelry itself. Here are some options for background choices:
- White or light-colored background: A white or light-colored background is a classic choice for jewelry photography as it provides a clean and simple backdrop that highlights the jewelry. A light-colored background also reflects light back onto the jewelry, which can enhance its sparkle and shine.
- Gradient background: A gradient background is a subtle and stylish choice that can add depth and interest to your photos. A gradual change in color from light to dark can add a 3D effect to the jewelry and create a professional and polished look.
- Textured background: A textured background, such as wood or marble, can add a natural and organic feel to your photos. It can also add a sense of context to the jewelry and create a more dynamic and interesting composition.
- Transparent background: A transparent background can be useful if you want to add your jewelry to different backgrounds or use it in marketing materials. This option is commonly used for e-commerce websites, where the product is displayed on a white background, and the background is removed using photo editing software.
When selecting a background, it’s essential to consider the type of jewelry you’re photographing and the overall look and feel you’re trying to achieve. The background should complement the jewelry and create a cohesive and visually appealing image.
What is the best camera lens for jewelry photography?
The best camera lens for jewelry photography is a macro lens. A macro lens is essential for jewelry photography as it allows you to get up close and capture the intricate details of each piece. Here are some factors to consider when choosing a macro lens for jewelry photography:
- Focal length: A macro lens with a focal length of 60mm to 100mm is recommended for jewelry photography. This allows you to get up close and capture the intricate details of each piece while maintaining a comfortable shooting distance.
- Aperture: A lens with a wide aperture, such as f/2.8 or f/4, will allow you to create a shallow depth of field and isolate the jewelry from the background. This will create a professional and polished look that showcases the jewelry.
- Image stabilization: Image stabilization is important for preventing camera shake and ensuring sharp images. Look for a lens with built-in image stabilization, or consider using a tripod to keep your camera steady.
- Quality: Look for a high-quality lens that is sharp and has minimal distortion. A high-quality lens will produce sharp and clear images that showcase the details of the jewelry.
Some popular macro lenses for jewelry photography include the Canon EF 100mm f/2.8L Macro IS USM, the Nikon AF-S VR Micro-Nikkor 105mm f/2.8G IF-ED, and the Sony FE 90mm f/2.8 Macro G OSS. By choosing the right macro lens, you can capture stunning images of jewelry that showcase the beauty and unique qualities of each piece.
What is the best composition and positioning for jewelry photography?
The best composition and positioning for jewelry photography will depend on the type of jewelry you are photographing and the story you want to tell with your images. However, here are some general tips to keep in mind:
- Showcase the unique features of the jewelry: When photographing jewelry, it’s essential to capture the unique features of the piece, such as the shape, color, and texture. Experiment with different angles and lighting to bring out these features and make the jewelry stand out.
- Use the rule of thirds: The rule of thirds is a standard composition guideline that divides the image into thirds both horizontally and vertically. Position the jewelry at one of the intersections of these lines to create a visually appealing composition.
- Play with symmetry and asymmetry: Symmetry can be useful for creating a balanced and harmonious composition, while asymmetry can add a sense of dynamism and interest. Experiment with both to find the composition that works best for your image.
- Keep the jewelry in focus: Make sure the jewelry is in focus, and the background is blurred to draw attention to the piece. This can be achieved by using a wide aperture and focusing on the jewelry.
- Use negative space: Negative space can be used to create a clean and minimalistic composition that draws attention to the jewelry. Experiment with different amounts of negative space to find the right balance for your image.
- Show the jewelry in context: When appropriate, show the jewelry in context to give it meaning and purpose. For example, you could show a necklace being worn by a model, or a ring being held by a hand.
By following these tips, you can create compelling and visually appealing jewelry photos that showcase the beauty and unique qualities of each piece.
How to edit jewelry product photos in photoshop
Editing jewelry product photos in Photoshop is an essential part of jewelry photography. Here are some steps to edit jewelry product photos in Photoshop:
- Adjust the exposure: Start by adjusting the exposure of your image using the “Exposure” tool. This will help to brighten or darken the image to your desired level.
- Adjust the white balance: Use the “White Balance” tool to ensure that the color of the jewelry is accurate and not affected by any color casts. You can adjust the temperature and tint sliders until the colors look accurate.
- Clean up the image: Use the “Spot Healing Brush” tool to remove any dust or blemishes on the jewelry. This will help to create a clean and polished look.
- Enhance the details: Use the “Sharpen” tool to enhance the details of the jewelry. This will help to bring out the intricate details and make the jewelry appear more crisp and sharp.
- Adjust the colors: Use the “Saturation” and “Vibrance” tools to adjust the colors of the jewelry. This will help to make the colors appear more vibrant and pop.
- Create a reflection: To create a reflection, duplicate the jewelry layer and flip it vertically. Then, use the “Layer Mask” tool to create a gradient mask over the reflection layer to blend it in with the original layer.
- Crop and resize the image: Use the “Crop” tool to crop the image to the desired size and aspect ratio. Then, use the “Image Size” tool to resize the image to the appropriate dimensions for your website or online store.
- Save the image: Save the edited image in a high-quality format such as JPEG or PNG, and make sure to use the appropriate file size for your website or online store.
By following these steps, you can create stunning jewelry product photos in Photoshop that showcase the beauty and unique qualities of each piece.


Why is consistency important in your product images when building a jewelry brand
Consistency is essential in building a successful jewelry brand as it helps create a strong and recognizable brand identity that customers can trust and relate to. Here are some reasons why consistency is important in your product images when building a jewelry brand:
- Builds brand recognition: Consistent product images create a consistent brand image that customers can easily recognize and remember. When customers see consistent product images, it reinforces the brand’s identity in their minds, making it easier for them to remember and identify the brand.
- Establishes professionalism: Consistent product images help establish the professionalism of a brand. When a brand’s product images are consistent, it conveys that the brand is reliable and takes its image seriously, which builds trust with customers.
- Creates a cohesive look and feel: Consistent product images help create a cohesive look and feel for a brand’s products. When a brand’s product images are consistent, they look like they belong together, which can make them more visually appealing and easier to merchandise.
- Allows for easy comparison: Consistent product images allow customers to easily compare products across the brand’s line. When a brand’s product images are consistent, customers can quickly see the similarities and differences between products, which can help them make informed purchasing decisions.
- Builds customer loyalty: Consistent product images help build customer loyalty. When a brand’s product images are consistent, it creates a sense of reliability and dependability that customers appreciate, which can lead to repeat business and referrals.
In summary, consistency in product images is critical for building a successful jewelry brand. Consistent product images help build brand recognition, establish professionalism, create a cohesive look and feel, allow for easy comparison, and build customer loyalty. By creating consistent product images, you can help your brand stand out in a crowded marketplace and build a loyal customer base.
You might think we’re all about Stainless Steel Jewelry, but #Blink is about change! Changing the way people look. Transforming the way people feel. Changing people’s futures and their lives. Though our fashion-forward Stainless Steel Jewelry are centered on fun, #Blink fulfills a serious mission. We believe that trendy Stainless Steel Jewelry can be available, and affordable, to women (and men) everywhere. We know that wearing a new look, and feeling confident in your appearance, builds amazing self-esteem. Our passion is inspiring dreams, empowering talents, and reaching goals by sharing our products and the excitement of #Blink. We see it happen every day.
Blink Agents/Resellers
This vision is made possible through the reach of #Blink’s Consultants. They’re the ones who bring our original designs to kitchen countertops and boutique shops. Our Consultants bring fun and fashion to everyday life, along with the chance to explore the #Blink opportunity for Jewelry Agents. Find us on Facebook and Instagram